如何使用自动化应用部署记录
本文详述Nuxt SSR应用的自动化部署方案,涵盖PM2与Docker两种GitHub Actions驱动的CI/CD方式,强调安全性、回滚能力与环境一致性,并提供SSL配置、Nginx反向代理、故障排查及加固措施等完整实践指南。
能让我驻足观赏的永远是待我的细节 .
如何使用自动化应用部署记录
本手册介绍 Nuxt SSR 应用的自动化部署方案,涵盖 PM2 和 Docker 两种部署方式,均通过 GitHub Actions 实现 CI/CD。但为了简单,我实际项目使用PM2方式部署
目录
整体架构
两种方案共享同一套 Nginx 配置,Nginx 反向代理到 localhost:3000,区别仅在于 3000 端口由 PM2 进程还是 Docker 容器监听。
方案对比
| 维度 | PM2 方案 | Docker 方案 |
|---|---|---|
| 部署方式 | SCP 上传构建产物 + PM2 重启 | 构建镜像推送到 GHCR + 拉取重启容器 |
| 环境一致性 | 依赖服务器 Node.js 版本 | 容器内自带 Node.js,完全一致 |
| 回滚能力 | 需手动备份,回滚慢 | 切换镜像标签即可回滚 |
| 服务器要求 | 需安装 Node.js + PM2 | 需安装 Docker |
| 资源开销 | 较低 | 略高(容器开销) |
| 适合场景 | 简单、轻量部署 | 需要环境隔离、多环境一致性 |
方案安全性分析
安全对比
| 安全维度 | PM2 | Docker | 风险等级 |
|---|---|---|---|
| 传输加密 | 尚未配置 SSL(HTTP 明文) | 尚未配置 SSL(HTTP 明文) | 🔴 高 |
| SSH 认证 | ed25519 密钥 + 禁用密码 | ed25519 密钥 + 禁用密码 | 🟢 低 |
| 进程隔离 | 共享宿主内核,无隔离 | 容器隔离,非 root 运行 | 🟡 中 |
| 权限控制 | sudoers 白名单精确匹配 | github_user 仅操作 Docker | 🟢 低 |
| 依赖安全 | npm ci + lockfile 锁定 | 多阶段构建,最终镜像无 devDeps | 🟢 低 |
| 回滚安全 | 需手动备份 | 镜像标签切换,可快速回滚 | 🟢 低 |
| 日志安全 | 建议配置 logrotate | Docker 原生日志管理 | 🟡 中 |
| 端口暴露 | 仅 Nginx 80/443 对外 | 仅 Nginx 80/443 对外 | 🟢 低 |
建议:当前两种方案均未配置 SSL 证书,流量以 HTTP 明文传输,存在中间人攻击和数据泄露的风险。建议在上线前完成下方 SSL 证书配置 部分,为站点启用 HTTPS 加密。
前置准备
以下配置两种方案共用。
1. 创建部署用户
在服务器上(root 下)创建 github_user 用户,用于 GitHub Actions SSH 连接:
bash
# 创建用户
useradd -m -s /bin/bash github_user
passwd github_user
2. 生成 SSH 密钥对
在你本地电脑执行:
bash
ssh-keygen -t ed25519 -C "github-actions-deploy" -f ~/.ssh/github_deploy_key生成两个文件:
~/.ssh/github_deploy_key— 私钥(保密,配置到 GitHub Secrets)~/.ssh/github_deploy_key.pub— 公钥(放到服务器)
3. 公钥写入服务器
bash
# 方式 1: 一键推送
ssh-copy-id -i ~/.ssh/github_deploy_key.pub github_user@服务器IP

# 方式 2: 手动添加(在服务器上以 github_user 登录后执行)
mkdir -p ~/.ssh && chmod 700 ~/.ssh
echo "这里粘贴公钥整行内容" >> ~/.ssh/authorized_keys
chmod 600 ~/.ssh/authorized_keys常见问题:如果仍然要求输入密码,用
ssh -v -i ~/.ssh/github_deploy_key github_user@服务器IP查看调试日志,重点看Offering public key和Authentications that can continue两行。常见原因是authorized_keys为空或权限不对(目录 700,文件 600,属主必须是 github_user)。
4. 验证 SSH 登录
bash
ssh -i ~/.ssh/github_deploy_key github_user@服务器IP
# 应该无需密码直接登录
5. 配置 GitHub Secrets
进入 仓库 → Settings → Secrets and variables → Actions,添加以下 Secrets:
| Secret | 值 | 说明 |
|---|---|---|
DEPLOY_HOST |
服务器 IP | 如 192.0.2.1 |
DEPLOY_USER |
github_user |
SSH 用户名 |
DEPLOY_SSH_KEY |
私钥完整内容 | 包含 -----BEGIN 和 -----END 行 |
DEPLOY_PORT |
SSH 端口 | 默认 22 |
DEPLOY_PATH |
/www/wwwroot/leisure-article |
部署目录 |
Docker 部署还需额外配置
GHCR_USER和GHCR_PAT,见 Docker 部署说明。
PM2 部署
核心思路:github_user 通过受控 sudo 权限执行 root 下的 PM2 命令,无需将 PM2 迁移到 github_user。
服务器端配置
配置目录写入权限
部署目录 /www/wwwroot/leisure-article 属主为 root,需要让 github_user 可写入:
bash
# root 下执行
groupadd wwwroot
usermod -aG wwwroot github_user
chown -R root:wwwroot /www/wwwroot/leisure-article
chmod -R 775 /www/wwwroot/leisure-article

# 确保新文件继承组权限
find /www/wwwroot/leisure-article -type d -exec chmod g+s {} \;
配置受控 sudo 权限
允许 github_user 无密码执行指定的 PM2 命令和部署操作,不开放其他 root 权限:
bash
# 先确认 pm2 路径
which pm2
# 输出例如:/usr/bin/pm2

# 创建 sudoers 配置
visudo -f /etc/sudoers.d/github_user-pm2
写入以下内容(将 /usr/bin/pm2 替换为实际路径):
github_user ALL=(root) NOPASSWD: /usr/bin/pm2 restart articleNuxt, /usr/bin/pm2 reload articleNuxt, /usr/bin/pm2 stop articleNuxt, /usr/bin/pm2 start /www/wwwroot/leisure-article/.output/server/index.mjs --name articleNuxt, /usr/bin/pm2 describe articleNuxt, /usr/bin/pm2 list, /usr/bin/pm2 logs articleNuxt *, /usr/bin/rm -rf /www/wwwroot/leisure-article/*, /usr/bin/tar -xzf /tmp/output.tar.gz -C /www/wwwroot/leisure-article说明:
articleNuxt是 PM2 进程名(不是目录名),由pm2 start ... --name articleNuxt指定。sudoers 按命令字符串精确匹配,不在白名单的命令会被拒绝。
验证:
bash
sudo su - github_user
sudo pm2 list        # 应该成功
sudo ls /root        # 应被拒绝
确保 PM2 服务正常运行
bash
# 确认 root 下 PM2 服务状态
pm2 list

# 如果未启动
pm2 start /www/wwwroot/leisure-article/.output/server/index.mjs --name articleNuxt
pm2 save
pm2 startup
GitHub Actions 工作流
文件 .github/workflows/deploy-master.yml:
yaml
name: Deploy Nuxt to Production

on:
  push:
    branches:
      - master

jobs:
  build-and-deploy:
    runs-on: ubuntu-latest

    steps:
      - name: Checkout code
        uses: actions/checkout@v4

      - name: Setup Node.js
        uses: actions/setup-node@v4
        with:
          node-version: '20'
          cache: 'npm'
          cache-dependency-path: package-lock.json

      - name: Install dependencies
        run: npm ci

      - name: Build Nuxt application
        run: npm run build
        env:
          NODE_ENV: production

      - name: Compress build output
        run: tar -czf output.tar.gz -C .output .

      - name: Upload tarball to server
        uses: appleboy/scp-action@v0.1.7
        with:
          host: ${{ secrets.DEPLOY_HOST }}
          username: ${{ secrets.DEPLOY_USER }}
          key: ${{ secrets.DEPLOY_SSH_KEY }}
          port: ${{ secrets.DEPLOY_PORT || 22 }}
          source: "output.tar.gz"
          target: "/tmp/"

      - name: Extract and restart service
        uses: appleboy/ssh-action@v1.0.3
        with:
          host: ${{ secrets.DEPLOY_HOST }}
          username: ${{ secrets.DEPLOY_USER }}
          key: ${{ secrets.DEPLOY_SSH_KEY }}
          port: ${{ secrets.DEPLOY_PORT || 22 }}
          script: |
            # 清理目标目录(通过 sudo 清理 root 创建的文件)
            sudo rm -rf ${{ secrets.DEPLOY_PATH }}/*
            # 解压压缩包
            sudo tar -xzf /tmp/output.tar.gz -C ${{ secrets.DEPLOY_PATH }}
            # 删除临时压缩包
            rm -f /tmp/output.tar.gz
            # 通过 sudo 执行 root 下的 pm2
            cd ${{ secrets.DEPLOY_PATH }}
            if sudo pm2 describe articleNuxt > /dev/null 2>&1; then
              sudo pm2 restart articleNuxt
              echo "PM2 服务已重启"
            else
              sudo pm2 start .output/server/index.mjs --name articleNuxt
              echo "PM2 服务已启动"
            fi
            echo "部署完成!"
部署流程
构建
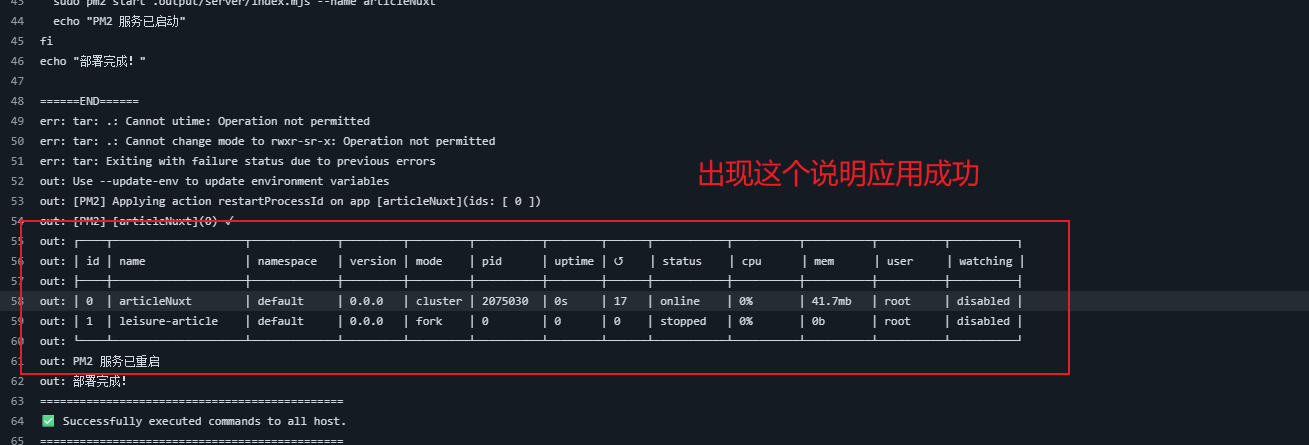
推送结果
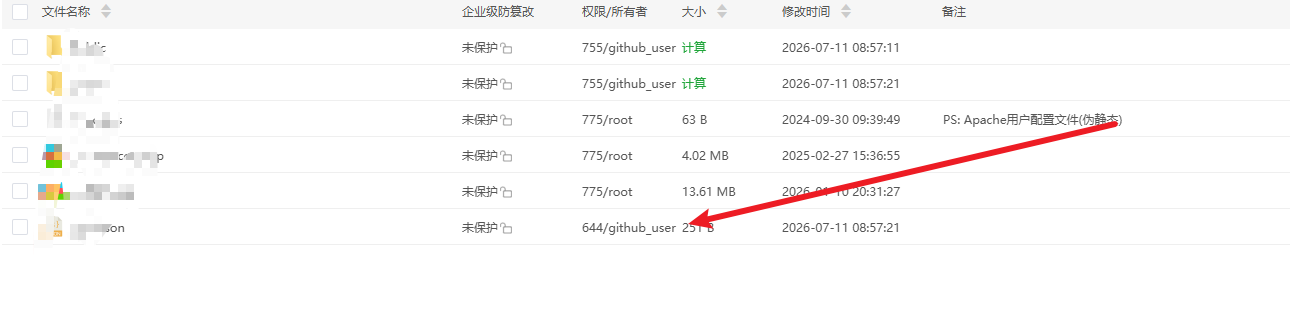
PM2 常用命令
bash
pm2 list                          # 查看所有进程
pm2 logs articleNuxt --lines 50   # 查看日志
pm2 restart articleNuxt           # 重启
pm2 monit                         # 监控面板
pm2 install pm2-logrotate         # 日志轮转
Docker 部署
核心思路:GitHub Actions 构建 Docker 镜像推送到 GHCR,SSH 到服务器拉取最新镜像并重启容器。
项目文件
Dockerfile
dockerfile
# ===== 阶段1: 依赖安装 =====
FROM node:20-alpine AS deps

WORKDIR /app

COPY package.json package-lock.json ./
RUN npm ci

# ===== 阶段2: 构建 =====
FROM deps AS builder

WORKDIR /app

COPY . .
RUN npm run build

# ===== 阶段3: 生产运行 =====
FROM node:20-alpine AS runner

WORKDIR /app

ENV NODE_ENV=production
ENV HOST=0.0.0.0
ENV PORT=3000

RUN addgroup --system --gid 1001 nodejs && \
    adduser --system --uid 1001 nuxtjs

COPY --from=builder /app/.output .output

USER nuxtjs

EXPOSE 3000

CMD ["node", ".output/server/index.mjs"]
.dockerignore
node_modules
.nuxt
.output
.git
.github
.workflow
.idea
.eslintcache
*.md
!README.md
scripts
docker-compose.yml(服务器上使用)
yaml
services:
  article-nuxt:
    image: ghcr.io/<你的GitHub用户名>/leisure-article:latest
    container_name: article-nuxt
    restart: unless-stopped
    environment:
      - NODE_ENV=production
      - HOST=0.0.0.0
      - PORT=3000
    ports:
      - "3000:3000"
将 <你的GitHub用户名> 替换为实际的 GitHub 用户名。
服务器端配置
安装 Docker
bash
curl -fsSL https://get.docker.com | sh
sudo systemctl start docker
sudo systemctl enable docker
首次登录 GHCR
需要生成 GitHub PAT(Personal Access Token):
- GitHub → Settings → Developer settings → Personal access tokens → Tokens (classic)
- Generate new token,勾选
read:packages和write:packages - 保存生成的 token
bash
echo "你的PAT" | docker login ghcr.io -u 你的GitHub用户名 --password-stdin首次启动
将 docker-compose.yml 上传到服务器 /www/wwwroot/leisure-article/ 下:
bash
cd /www/wwwroot/leisure-article
docker compose pull
docker compose up -d
GitHub 配置
在基础 Secrets 之外,还需添加:
| Secret | 值 | 说明 |
|---|---|---|
GHCR_USER |
GitHub 用户名 | 用于服务器登录 GHCR |
GHCR_PAT |
GitHub PAT | 需 read:packages 权限 |
GHCR 包可见性设为 Public(否则每次拉取需登录):
- GitHub → 仓库页面 → Packages
- Package settings → Danger Zone → Change visibility → Public
GitHub Actions 工作流
文件 .github/workflows/deploy-docker.yml:
yaml
name: Deploy with Docker

on:
  push:
    branches:
      - master

env:
  REGISTRY: ghcr.io
  IMAGE_NAME: ${{ github.repository }}

jobs:
  build-and-push:
    runs-on: ubuntu-latest
    permissions:
      contents: read
      packages: write

    steps:
      - name: Checkout code
        uses: actions/checkout@v4

      - name: Login to GitHub Container Registry
        uses: docker/login-action@v3
        with:
          registry: ${{ env.REGISTRY }}
          username: ${{ github.actor }}
          password: ${{ secrets.GITHUB_TOKEN }}

      - name: Extract metadata
        id: meta
        uses: docker/metadata-action@v5
        with:
          images: ${{ env.REGISTRY }}/${{ env.IMAGE_NAME }}
          tags: |
            type=sha,prefix=
            type=raw,value=latest

      - name: Build and push Docker image
        uses: docker/build-push-action@v5
        with:
          context: .
          push: true
          tags: ${{ steps.meta.outputs.tags }}
          labels: ${{ steps.meta.outputs.labels }}
          cache-from: type=gha
          cache-to: type=gha,mode=max

  deploy:
    needs: build-and-push
    runs-on: ubuntu-latest

    steps:
      - name: Deploy via SSH
        uses: appleboy/ssh-action@v1.0.3
        with:
          host: ${{ secrets.DEPLOY_HOST }}
          username: ${{ secrets.DEPLOY_USER }}
          key: ${{ secrets.DEPLOY_SSH_KEY }}
          port: ${{ secrets.DEPLOY_PORT || 22 }}
          script: |
            cd ${{ secrets.DEPLOY_PATH }}

            # 登录 GitHub Container Registry
            echo "${{ secrets.GHCR_PAT }}" | docker login ghcr.io -u ${{ secrets.GHCR_USER }} --password-stdin

            # 拉取最新镜像并重启
            docker compose pull
            docker compose up -d --force-recreate

            # 清理旧镜像
            docker image prune -f

            echo "Docker 部署完成"
部署流程
Docker 常用命令
bash
docker compose ps                              # 查看容器状态
docker compose logs -f article-nuxt            # 查看日志
docker compose restart                         # 手动重启
docker compose pull && docker compose up -d    # 拉取并重启
docker compose exec article-nuxt sh            # 进入容器
docker image prune -a -f                       # 清理所有旧镜像
方案切换与迁移
PM2 → Docker
bash
# 1. 停止 PM2 服务
pm2 stop articleNuxt
pm2 delete articleNuxt
pm2 save

# 2. 确认 3000 端口空闲
lsof -i :3000

# 3. 上传 docker-compose.yml 到 /www/wwwroot/leisure-article/

# 4. 启动 Docker 容器
cd /www/wwwroot/leisure-article
docker compose pull
docker compose up -d

# 5. 验证
curl -I http://localhost:3000
Docker → PM2
bash
# 1. 停止 Docker 容器
cd /www/wwwroot/leisure-article
docker compose down

# 2. 确认 3000 端口空闲
lsof -i :3000

# 3. 确保 .output 构建产物存在
ls /www/wwwroot/leisure-article/.output/server/index.mjs

# 4. 启动 PM2
pm2 start /www/wwwroot/leisure-article/.output/server/index.mjs --name articleNuxt
pm2 save

# 5. 验证
curl -I http://localhost:3000
切换方案后,记得在 GitHub 上启用/禁用对应的工作流文件(.github/workflows/deploy-master.yml 或 deploy-docker.yml)。
SSL 证书配置
两种方案共用。提供三种获取证书的方式,按需选择:
已有云厂商证书
如果已在阿里云、腾讯云等平台购买或申请过 SSL 证书,直接上传到服务器即可。
从云厂商下载证书
- 登录云控制台 → SSL 证书管理
- 找到对应域名证书,点击下载
- 服务器类型选择 Nginx,下载得到压缩包
- 解压后包含两个文件:
www.example.com.pem— 证书文件(含证书链)www.example.com.key— 私钥文件
上传到服务器
bash
# 在服务器上创建证书目录
sudo mkdir -p /etc/nginx/ssl

# 上传证书文件(本地执行)
scp www.example.com.pem root@服务器IP:/etc/nginx/ssl/
scp www.example.com.key root@服务器IP:/etc/nginx/ssl/

# 设置权限(服务器上执行)
sudo chmod 600 /etc/nginx/ssl/www.example.com.key
sudo chmod 644 /etc/nginx/ssl/www.example.com.pem证书路径:后续 Nginx 配置中
ssl_certificate指向.pem,ssl_certificate_key指向.key。
续期方式
云厂商免费证书通常有效期 1 年,需手动续期:
bash
# 到期前重新在控制台申请,下载后覆盖上传
scp 新证书.pem root@服务器IP:/etc/nginx/ssl/www.example.com.pem
scp 新证书.key root@服务器IP:/etc/nginx/ssl/www.example.com.key

# 重载 Nginx
sudo nginx -t && sudo systemctl reload nginx
Let's Encrypt 免费证书(推荐,自动续期)
1. 安装 Certbot
bash
# Ubuntu/Debian
sudo apt update
sudo apt install -y certbot python3-certbot-nginx

# CentOS/RHEL
sudo yum install -y certbot python3-certbot-nginx
2. 申请证书
前提:域名已解析到服务器 IP,且 Nginx 已在运行(至少有 HTTP 的 server 块)。
自动配置(推荐)
Certbot 自动修改 Nginx 配置并申请证书:
bash
sudo certbot --nginx -d www.example.com -d example.com按提示操作:
- 输入邮箱(用于证书过期提醒)
- 同意服务条款
- 选择是否将 HTTP 重定向到 HTTPS(建议选择
2: Redirect)
仅获取证书(手动配置 Nginx)
bash
sudo certbot certonly --nginx -d www.example.com -d example.com证书文件位置:
/etc/letsencrypt/live/www.example.com/fullchain.pem   # 证书链
/etc/letsencrypt/live/www.example.com/privkey.pem      # 私钥
3. 验证证书自动续期
Let's Encrypt 证书有效期 90 天,Certbot 会自动续期:
bash
# 检查续期定时任务
sudo systemctl list-timers | grep certbot

# 手动测试续期(不会实际续期,仅验证流程)
sudo certbot renew --dry-run
从云厂商申请新的免费证书
阿里云和腾讯云均提供每年 20 个免费 DV 证书,适合不能使用 Certbot 自动验证的场景(如内网服务、通配符证书等)。
阿里云
- 登录 阿里云 SSL 证书控制台
- 点击 购买证书 → 选择 免费证书 → 支付(0 元)
- 填写域名
www.example.com,选择 DNS 验证 - 按提示添加 DNS TXT 记录验证域名所有权
- 签发后下载 Nginx 格式证书
腾讯云
- 登录 腾讯云 SSL 证书控制台
- 点击 申请免费证书 → 选择域名型(DV)免费证书
- 填写域名
www.example.com,选择验证方式(DNS 或文件验证) - 按提示完成验证
- 签发后下载 Nginx 格式证书
上传与配置
下载后的操作与已有云厂商证书相同,上传到 /etc/nginx/ssl/ 并配置 Nginx。
证书方式对比
| 维度 | 已有云厂商证书 | Let's Encrypt | 新申请云厂商免费证书 |
|---|---|---|---|
| 费用 | 已购买 | 免费 | 免费(每年 20 个) |
| 有效期 | 1 年 | 90 天 | 1 年 |
| 续期方式 | 手动下载上传 | 自动续期 | 手动下载上传 |
| 通配符支持 | 取决于证书类型 | 需 DNS 插件 | 不支持 |
| 适用场景 | 已有证书直接用 | 服务器可外网访问 | 内网/Certbot 不可用 |
证书申请流程
Nginx 反向代理配置
两种方案共用,Nginx 代理到 localhost:3000。根据证书来源选择对应配置:
如果已通过
certbot --nginx自动配置,Certbot 会自动修改 Nginx,以下供手动配置参考。
使用 Let's Encrypt 证书
nginx
# HTTP → HTTPS 强制重定向
server {
    listen 80;
    server_name www.example.com example.com;

    # Let's Encrypt 验证路径(续期时需要)
    location /.well-known/acme-challenge/ {
        root /var/www/html;
    }

    # 其余请求重定向到 HTTPS
    location / {
        return 301 https://$host$request_uri;
    }
}

# HTTPS 主配置
server {
    listen 443 ssl http2;
    server_name www.example.com example.com;

    # Let's Encrypt 证书
    ssl_certificate     /etc/letsencrypt/live/www.example.com/fullchain.pem;
    ssl_certificate_key /etc/letsencrypt/live/www.example.com/privkey.pem;

    # SSL 加密参数(Mozilla Intermediate 推荐)
    ssl_protocols TLSv1.2 TLSv1.3;
    ssl_ciphers ECDHE-ECDSA-AES128-GCM-SHA256:ECDHE-RSA-AES128-GCM-SHA256:ECDHE-ECDSA-AES256-GCM-SHA384:ECDHE-RSA-AES256-GCM-SHA384;
    ssl_prefer_server_ciphers off;

    # HSTS(强制浏览器后续使用 HTTPS,首次启用建议先设 1 天观察)
    add_header Strict-Transport-Security "max-age=86400; includeSubDomains" always;

    # 反向代理到 Nuxt 应用
    location / {
        proxy_pass http://localhost:3000;
        proxy_http_version 1.1;
        proxy_set_header Upgrade $http_upgrade;
        proxy_set_header Connection 'upgrade';
        proxy_set_header Host $host;
        proxy_set_header X-Real-IP $remote_addr;
        proxy_set_header X-Forwarded-For $proxy_add_x_forwarded_for;
        proxy_set_header X-Forwarded-Proto $scheme;
        proxy_cache_bypass $http_upgrade;
    }
}
使用云厂商证书(阿里云/腾讯云)
只需将证书路径替换为云厂商证书存放位置,其余配置相同:
nginx
# HTTP → HTTPS 强制重定向
server {
    listen 80;
    server_name www.example.com example.com;
    return 301 https://$host$request_uri;
}

# HTTPS 主配置
server {
    listen 443 ssl http2;
    server_name www.example.com example.com;

    # 云厂商证书(替换为实际上传路径)
    ssl_certificate     /etc/nginx/ssl/www.example.com.pem;
    ssl_certificate_key /etc/nginx/ssl/www.example.com.key;

    ssl_protocols TLSv1.2 TLSv1.3;
    ssl_ciphers ECDHE-ECDSA-AES128-GCM-SHA256:ECDHE-RSA-AES128-GCM-SHA256:ECDHE-ECDSA-AES256-GCM-SHA384:ECDHE-RSA-AES256-GCM-SHA384;
    ssl_prefer_server_ciphers off;

    add_header Strict-Transport-Security "max-age=86400; includeSubDomains" always;

    location / {
        proxy_pass http://localhost:3000;
        proxy_http_version 1.1;
        proxy_set_header Upgrade $http_upgrade;
        proxy_set_header Connection 'upgrade';
        proxy_set_header Host $host;
        proxy_set_header X-Real-IP $remote_addr;
        proxy_set_header X-Forwarded-For $proxy_add_x_forwarded_for;
        proxy_set_header X-Forwarded-Proto $scheme;
        proxy_cache_bypass $http_upgrade;
    }
}
验证 HTTPS 配置
bash
# 检查 Nginx 配置语法
sudo nginx -t

# 重载 Nginx
sudo systemctl reload nginx

# 验证 HTTPS 是否生效
curl -I https://www.example.com
# 应看到 HTTP/2 200

# 验证 HTTP 重定向
curl -I http://www.example.com
# 应看到 301 → https://www.example.com
故障排查
SSH 登录仍需密码
bash
# 用 -v 查看详细日志
ssh -v -i ~/.ssh/github_deploy_key github_user@服务器IP
重点看:
Offering public key— 尝试发送公钥Server accepts key— 服务器接受了(正常)Authentications that can continue: password— 公钥被拒,回退密码
常见原因:
authorized_keys为空或内容不匹配 → 重新写入公钥- 权限不对 →
chmod 700 ~/.ssh && chmod 600 ~/.ssh/authorized_keys - 属主不对 →
chown -R github_user:github_user ~/.ssh
PM2 方案:Permission denied
bash
# 检查目录权限
ls -la /www/wwwroot/leisure-article/
# 确认 root:wwwroot 775

# 检查用户组
groups github_user
# 确认包含 wwwroot

# 检查 sudoers
sudo visudo -c -f /etc/sudoers.d/github_user-pm2
PM2 方案:sudo pm2 提示 not allowed
bash
# 检查 pm2 路径是否与 sudoers 一致
which pm2

# 检查 sudoers 语法
sudo visudo -c -f /etc/sudoers.d/github_user-pm2
PM2 方案:tar 解压 Operation not permitted
目标目录属主是 root,github_user 无法修改目录元信息。解压和解压前清理都需要 sudo,已在工作流和 sudoers 中配置。
Docker 方案:镜像拉取 unauthorized
bash
# 重新登录 GHCR
echo "你的PAT" | docker login ghcr.io -u 你的用户名 --password-stdin

# 检查 PAT 权限和有效期
Docker 方案:端口冲突
bash
# 检查 3000 端口占用
sudo lsof -i :3000

# 如果是 PM2 占用,先停掉
pm2 stop articleNuxt && pm2 delete articleNuxt && pm2 save
Docker 方案:容器启动后立即退出
bash
docker compose logs article-nuxt
# 查看退出原因
服务无法启动(通用)
bash
# PM2
pm2 logs articleNuxt --lines 50
lsof -i :3000

# Docker
docker compose logs article-nuxt

# 检查 Node.js 版本(PM2 方案)
node -v  # 应为 v20.x
安全加固
1. SSH 仅允许密钥登录
编辑 /etc/ssh/sshd_config:
PasswordAuthentication no
PubkeyAuthentication yes
bash
sudo systemctl restart sshd2. sudoers 最小权限
PM2 方案中,github_user 仅能执行白名单内的命令,无法 sudo ls /root 或其他操作。
3. PM2 日志轮转
防止日志无限增长:
bash
pm2 install pm2-logrotate
pm2 set pm2-logrotate:max_size 50M
pm2 set pm2-logrotate:retain 7
4. Docker 镜像安全
- 使用非 root 用户运行(Dockerfile 中
USER nuxtjs) - 多阶段构建,最终镜像不含源码和 devDependencies
- 定期清理旧镜像:
docker image prune -a -f
5. 部署目录权限
PM2 方案通过组权限控制写入,属主保持 root:
drwxrwsr-x root wwwroot /www/wwwroot/leisure-article/